
Logic Level Shifters
Product Description
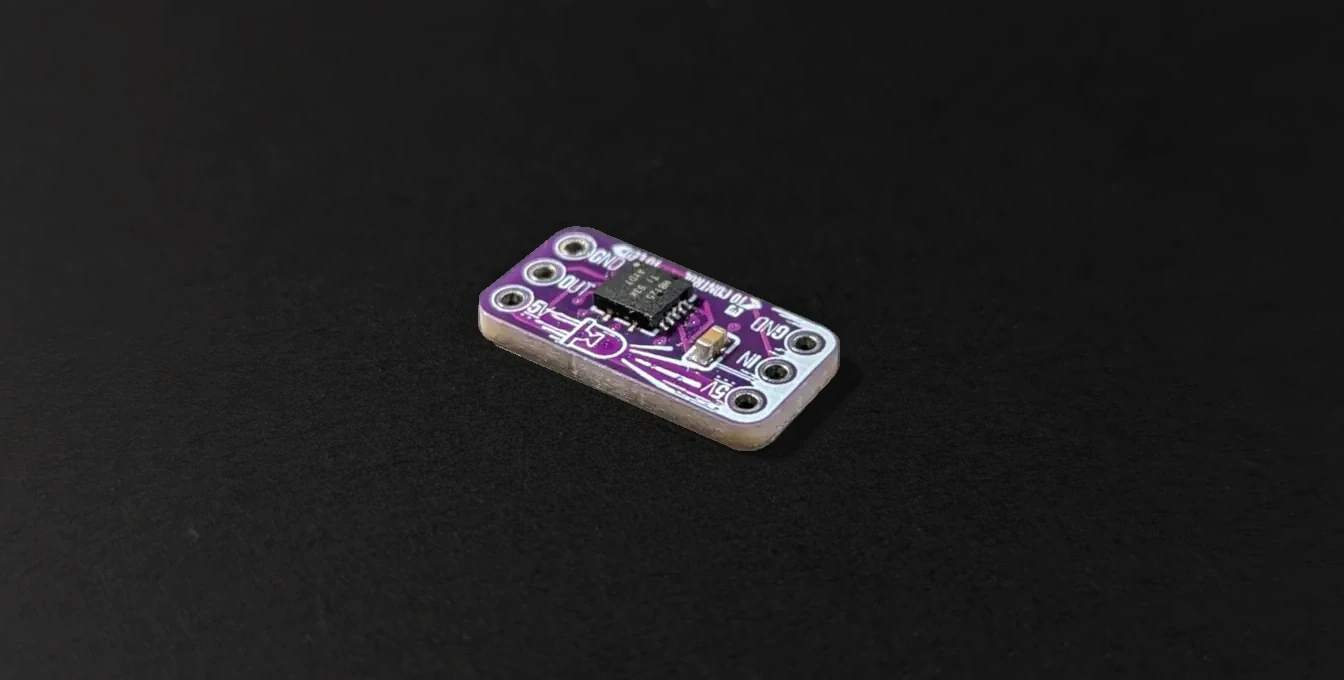
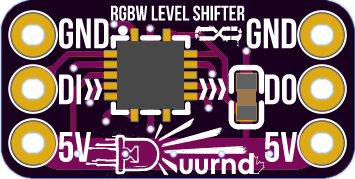
Our Helios level shifter breakout board is designed to quickly and easily allow you to integrate devices like an RGB LED that require 5V logic when you're using a device like a Raspberry Pi, Pi Pico, ESP32 or ESP8266 that only provides 3.3v logic.
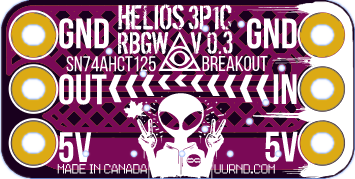
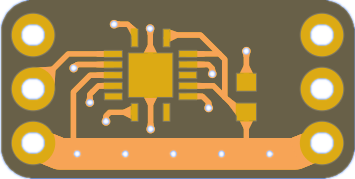
Based on the super reliable SN74HCT125N, it is a quadruple bus buffer gate designed for high-speed CMOS logic, featuring 3-state outputs and TTL-compatible inputs. The small and easy to integrate breakout board for this tiny surface mount IC transforms it into a robust, easy-to-use module, essential for interfacing 3.3V microcontrollers with 5V components.
Our 3 pin single channel (Helios 3P1C) board is designed to be quick and easy peasy to integrate with 5V electronics, in fact, its all you need to integrate some of the more common 5V RGB(W) LED lights with common microcontrollers. While its been designed for copnverting data/logic from 3.3V to 5V and vice versa level shifting, it can be used with up to 24V LED's or higher provided the device uses 5V logic for there data pins. The problem we've seen is that almost all implementations online for the 74HCT125N model of chips have incorrect implementations, even the original data sheets contain errors that cause issues down the road. We've spent a lot of time designing the most effective and reliable board. Our main test board has been running for 5 years straight without issue. So we can assure you of its reliability. We're as with the incorrect implementations we've seen they will freuquently work but have issues with flickering, blinking and burning out. We aim to put a stop to this quickly and cheapily.
When do you need a Helios SN74HCT125N Breakout Board?
Anytime you want to integrate a device, sensor, LED or controller that uses 5V logic with a microcontroller that only provides 3-3.3V logic on its GPIO pins.
What are the benefits of using a SN74HCT125N Breakout Board like the Helios?
-
Interface Safely
- Protects sensitive 3.3V devices (like ESP32/Raspberry Pi) from damage when interfacing with 5V components
-
Improved Signal Integrity
- It acts as a buffer, providing strong 5V signals driving and improving signal quality over longer cables compared to direct GPIO connections.
-
Lower Delays
- Our boards do not slow down communication protocols or high-speed data lines.
-
Quick and Easy Prototyping
- Our small boards completely eliminate the need to research, design and solder individual components directly, allowing for quick swapping and debugging. Since they're ready to drop into your project right now they could also save you a ton of time
Why choose a UU R&D Device?
-
Proudly Made in Canada
- All our products and (whenever possible) parts are manufactured in-house in Canada.
-
Every Single Device is Personally Tested
- You read that right, we're not testing one out of ten thousand, or one out of a thousand or even one out of every hundred products. We test, approve and verify with human beings every single device we manufacture. This way were able to confirm each device is working before it leaves our offices and have a verifiable chain we can use to track down problems if anything happens.
-
Research, Iterated and Dogfood Eaten.
- All our designs are thoroughly researched, designed and iterated on to provide you with the most reliable and useful devices. Not only that we eat our own dogfood here. We actually use all the products we make. If you'd like to see some of our projects we've made with our own products we will be posting them to uurnd.com/projects
-
Inexpensive
- Since we manufacture all our devices in house we're able to offer cheaper prices then other independant and even some international companies. Sometimes we're able to provide them cheaper then if you were to purchase the raw materials yourself.
Compatible Devices:
While our boards will work anything that regular 74HCT125N chip will work with. Here is a list of devices that we have tested it on and can confirm it works perfectly.
Microcontrollers (3.3V aka the Low side):
- ESP32
- ESP8266
- Teensy 3.x/4.x
- Raspberry Pi Pico
- Raspberry Pi (2,3,4,5)
- Raspberry Pi Zero/W
- Raspberry Pi Zero 2/W
- STM32
- Arduino Due
- NodeMCU
Peripheral Devices (5V aka the High side):
- WS2812B RGB Leds
- WS2813 RGB Leds
- WS2815 RGB Leds
- SK6812 RGBW Leds
- Adafruit's NeoPixel RGB Leds
- WS2811 12V Addressable RGB Leds (They use 5V logic)
- Numerous 5V Sensors, Motor Drivers, LCDs and Motor controllers
See our full list of devices we have tested on our Github
Tips for using the Helios Breakout Boards:
-
Always keep the wires between your LED's input and the Helios Level Shifter's output as short as possible.
-
No room to fit our teeny 3 pin board into your project? No Problem, It's designed so it can be placed inline with any compatible LED strip. Just drop it in between your MCU and your LED strip.
-
To prevent damage to your microcontroller, LEDs or any other sensor or device you may be connecting to said microcontroller whenever possible turn off the power before connecting or disconnecting them to the MCU. However, if you're able it is better to completely unplug the power source from the MCU or device before connecting/disconnecting it even when the power is already turned off. Then proceed to turn it on after its fully connected.
-
If it's not possible to plug your device(s) into your MCU with the power disconnected then be sure to always connect your devices pins to the MCU in the following order: Ground, Data and then lastly connect Power. To disconnect a device you follow the reverse ordering: Disconnect Power First, Data and then Lastly Ground.
-
If you're using an LED Strip that is anywhere between 5V to 24V you can still use one of our 3 or 4 pin level shifters. Most RGB Leds still use 5V for their data IO pins so you can control them with our level shifter no problem. Check one of our connection guides below. *Always double check your LED's are actually 5V usign logic before continuing
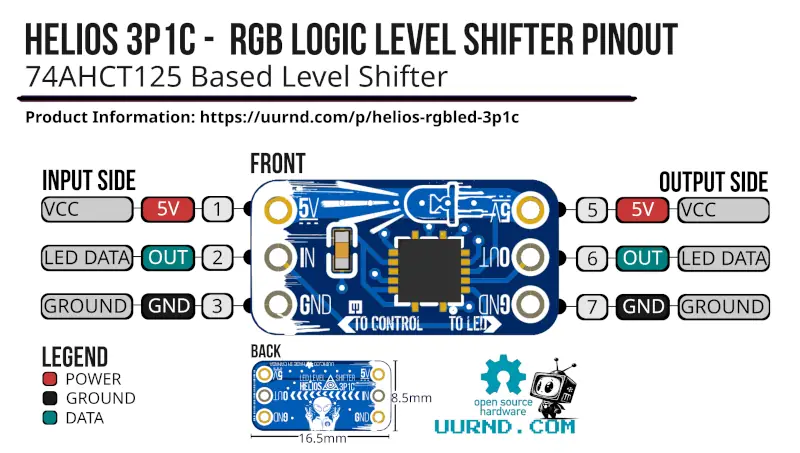
Connection Guides
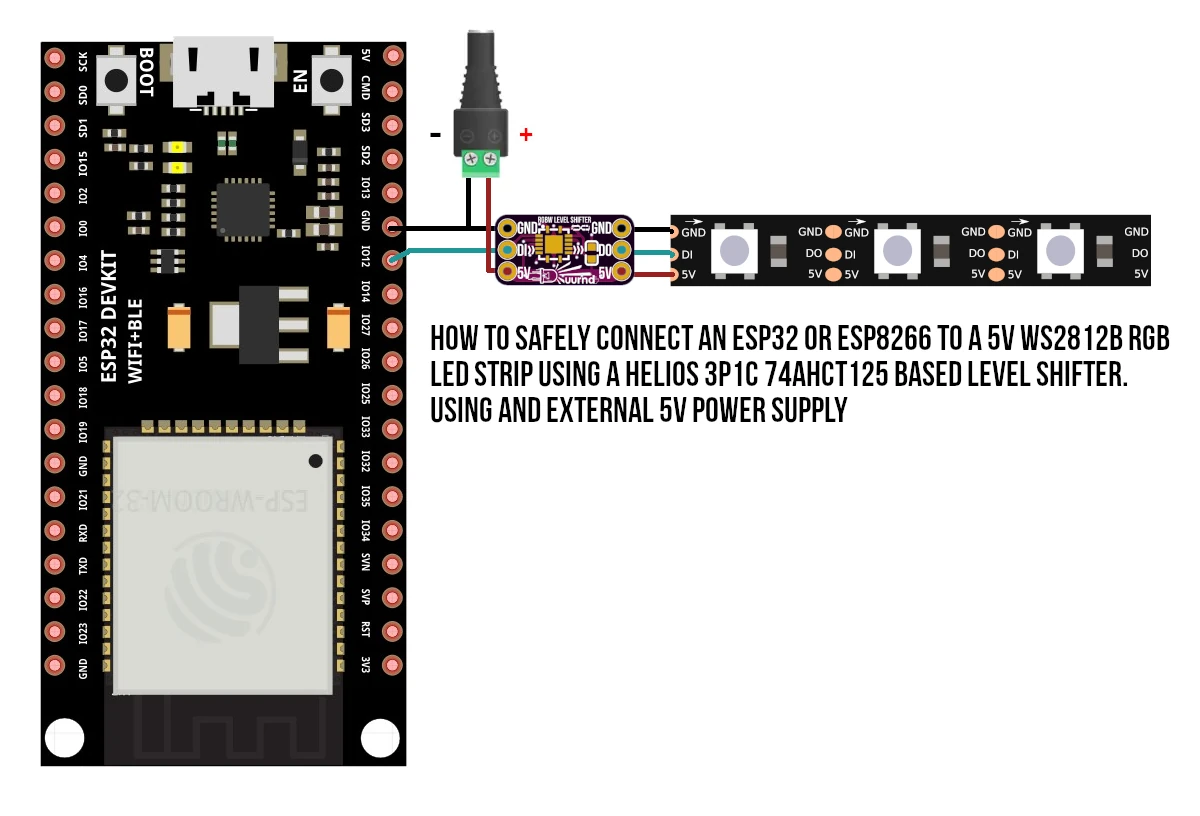 Connecting ESP32 or ESP8266 to Externally Powered 5V RGB LEDs using Helios 3P1C
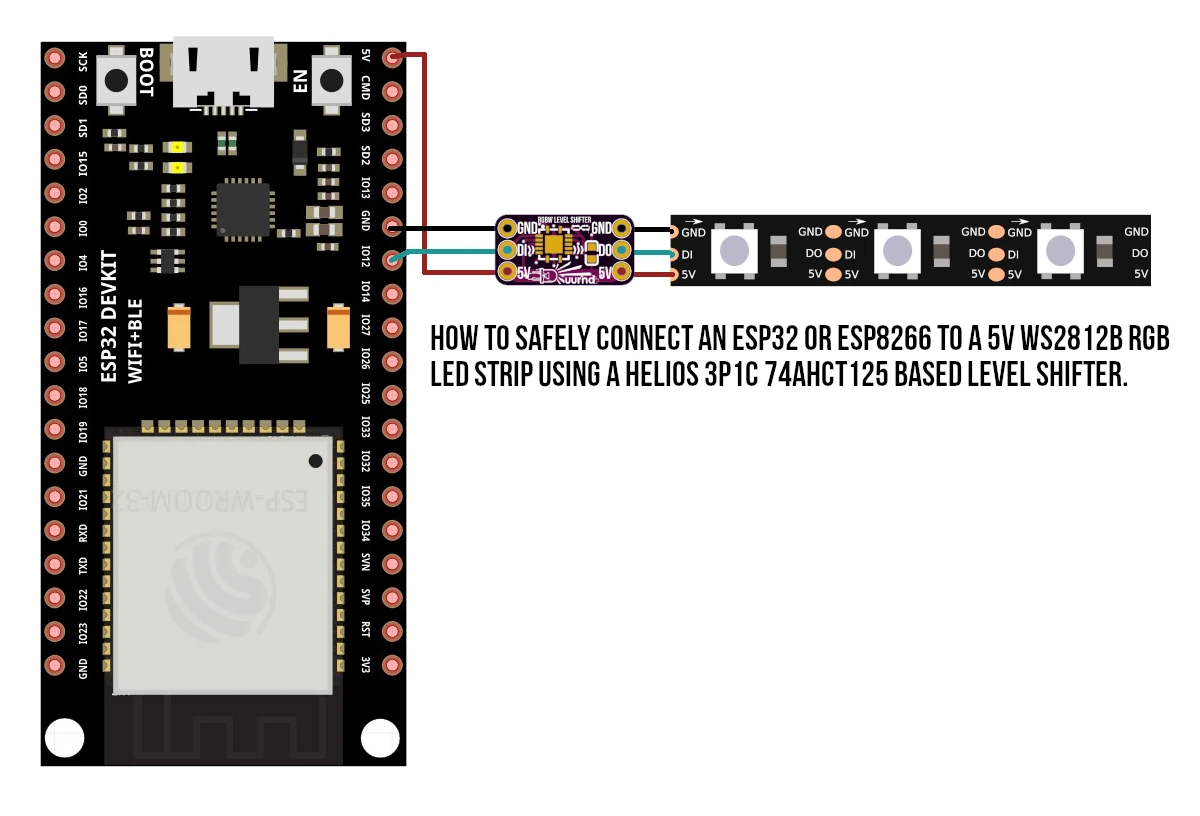 Connecting ESP32 or ESP8266 to 5V RGB LEDs using Helios 3P1C
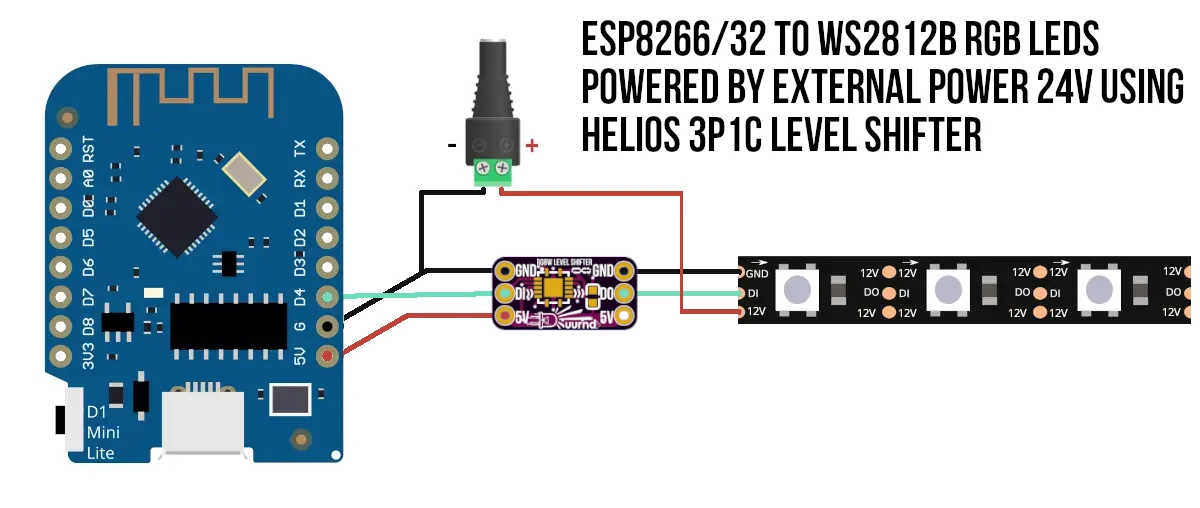 Connecting WEMOS D1 Mini to Externally Powered 24V RGB LEDs using Helios 3P1C
Schematics, Layout, BOM, Gerbers and More!
Helios RGB LED Level Shifter 3-Pin
Logic Level 3V - 5V
UPC: 627146259859
Stop Struggling with dim, randomly flickering RGB LED Strips! Simply slot one of our Helios RGB Level Shifters in between your microcontroller or single board computer (Like a Raspberry Pi) and any 5V RGB LED's will work just like the devices natively supports 5V communication. This device supports communication between a lower voltage (Between 2-4v) device and a higher voltage 5V.
Key Features:
- Simplest setup. Connect in-between a 5V LED and your ~3V Microcontroller, DONE!
- Long Lifetime
- Open Source Product
- Small space requirements in your project
 Canadian designed and manufactured